556835 Singapore

I first discovered dumplings when we were living in Australia and I was travelling to Hong Kong regularly for work.
Of course I had eaten some “Chinese raviolis vapeurs” in France before… But oh my god, nothing slightly comparable ! From the skin to the filling, dumplings can be so versatile and flavorful. Of course, I always go for the vegetarian options when I eat dumplings in restaurants or hawker centers in Singapore, and the choice is more limited. So sometimes I prefer to make them at home, especially when I want to have more consistent ones, like those tofu veggie ones, which are super balanced and nourishing.
I am sharing below the recipe of the filling, but for the dough, I must confess I haven’t found the proper recipe yet. So just buy some good quality wraps like these wholewheat I found, or wait until I crack the recipe 🙂
Instructions (serves 4)
- 3 tbsp coconut oil (or olive oil)
- 1,5 cups finely shredded cabbage
- 0,5 cups grated carrots
- 1 block (200 grs firm tofu), drained
- 1/2 cup shredded cilantro
- 1/2 cup shredded chives
- 1 chopped white onion
- 1 big tbsp minced ginger
- 2 tsp minced garlic
- 2 tbsp sesame oil
- 2 tbsp shaoxing rice wine (substitutes can be mirin, then omit the sugar, or dry sherry)
- 1 tsp sugar
- 3/4 tsp salt
- A good pinch of pepper
Instructions
- Heat up your wok or large pan, and add the coconut oil, then add the onions and cook until translucent. Add the garlic and ginger and cook stirring well for 1 more min.
- Add the cabbage, carrots and crumbled tofu and cook until veggies are tender (5 min stir fry approx).
- Take it away from the fire. Add the herbs, and all the other ingredients, stir well to mix everything all together and let it cool down
- Once it has cooled down, you can start assembling your dumplings. Take a wrapper, wet one half, pour a heaped tbsp of filling (or more depending on the size of your wrapper), and pinch the sides to close your dumpling.
- Then finish cooking, but heating up a pan with 1 tbsp of oil. Put some dumplings (ensuring they don’t touch) and let them fry for 2 min (until the bottom is crusty). Pour 1/4 cup water and cover with a lid and let cook until all water has been absorbed (approx 8/10 min)
- Remove the lid, let them for 1 more min in the pan, and eat with some spice sesame oil (recipe in dressings)
- Enjoy
Nb: if you don’t plan to eat all your dumplings, freeze the raw dumplings and when you feel like having some, follow the same process as with fresh ones to reheat and cook them.
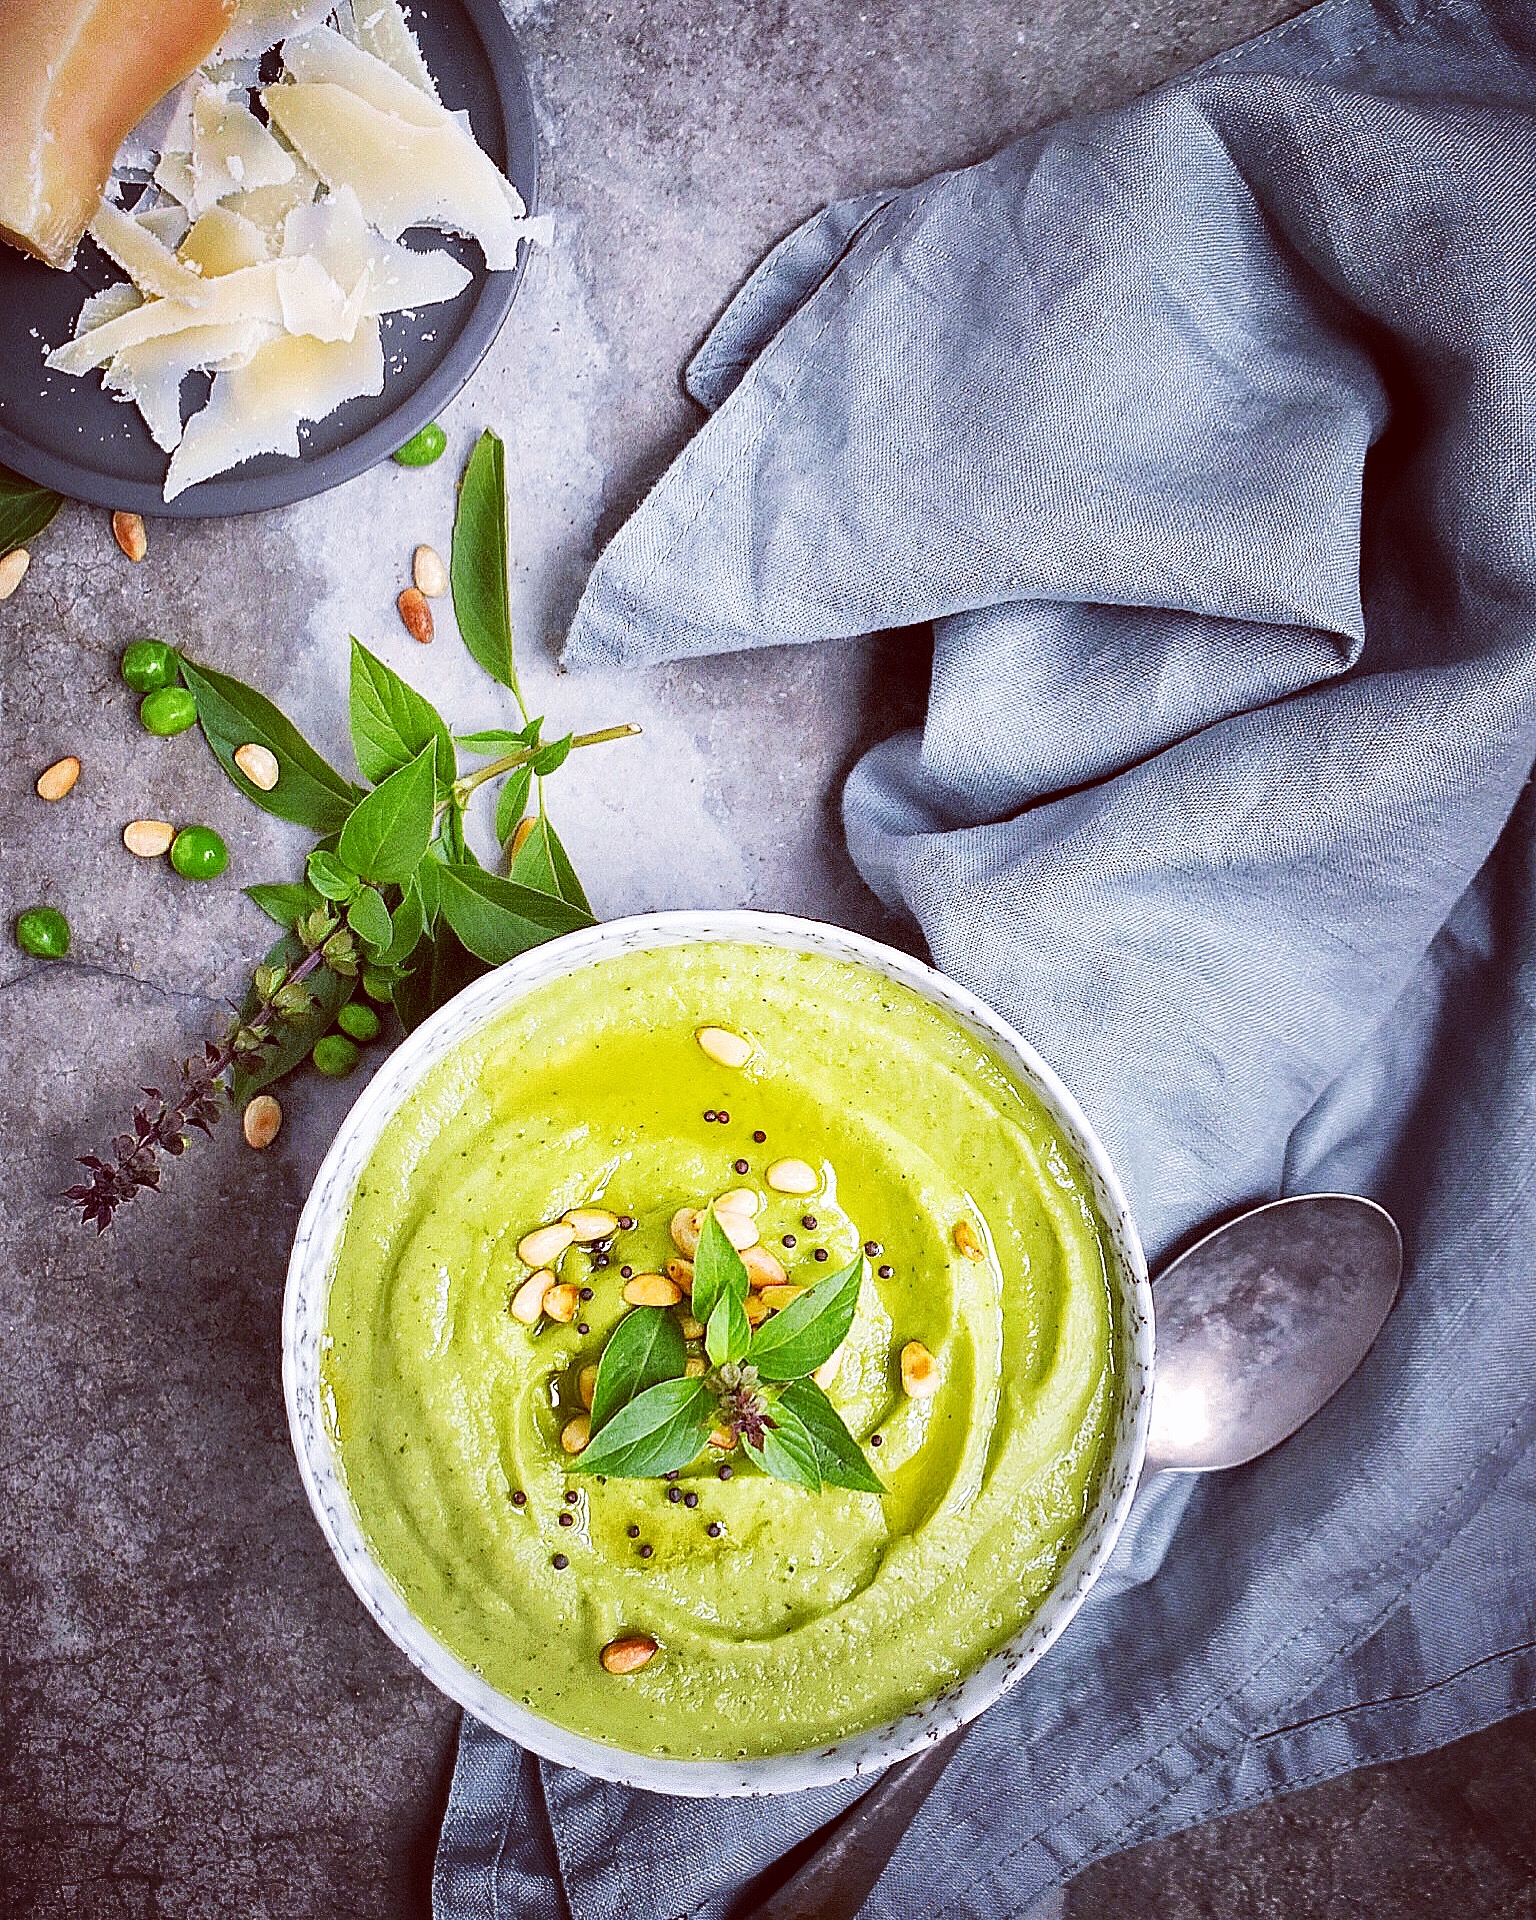
When you have a few veggies left in the fridge and some nice herbs and nuts, soups are the easiest, yummiest and super nutritiously healthy way to have the perfect meal. This soup is a pretty (yet basic 🙂 ) Roasted Thyme Zucchini and Peas soup. You will see it is really really easy to make and requires very few ingredients. And yet it is so delicious. Vegetarian and gluten free, but skip the parmesan and it will be vegan and GF 🙂 If you try it let me know how you enjoyed it. Recipe just below.
Ingredients (serves 4)Serves 4
- 1 kg zucchini
- 4 garlic cloves
- 2 tbsp olive oil
- 500 ml vegetable stock
- 3 tbsp almond milk unsweetened
- 300 gros frozen peas thawed
- 3 tbsp fresh thyme
- 50 grs parmesan (or use vegan parmesan for vegan variation)
- 2 tbsp shredded basil
- 2 tbsp pine nuts
Instructions
- Preheat the oven to 180ºC fan forced
- Dice the zucchinis in small cubes, put them with the garlic cloves (with their skin but trimmed edge) in a bowl and drizzle with the olive oil, a pinch of salt and pepper. Stir to coat well.
- Place on the baking fray and roast for 40 min, stirring halfway (the zucchinis should be golden brown)
- Pour the cooled down roasted vegetables in your high speed blender (remove the garlic skin 🙂 and add the peas, parmesan, thyme and half the stock.
- Blend to get a puree and add the almond milk.
- Add more stock to get the consistency you like, taste, add more salt and pepper if needed and keep aside.
- Roast the pine nuts in a pan
- Serve the soup in a pretty bowl, topped with the roasted pine nuts, shredded basil, a thyme sprig, a drizzle of olive oil and shaved parmesan.
- Enjoy with a nice slice of sourdough bread or olive oil focccacia !
Nb: this soup keeps well in the fridge for up to 36 hours in an airtight container.